|
My first car was a 1971 Duster. Although is started life as a meager slant six, it ended its life with a V8 4 speed. When I installed the 4 speed I also installed a Pistol Grip Hurst shifter from a 71 Challenger. I knew when I ordered my 2010 challenger I needed to get another shifter like that one.
To start this upgrade I bought a Hurst Competition/Plus 2 short throw shifter upgrade.
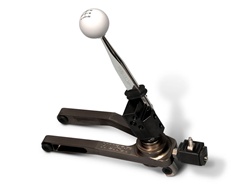
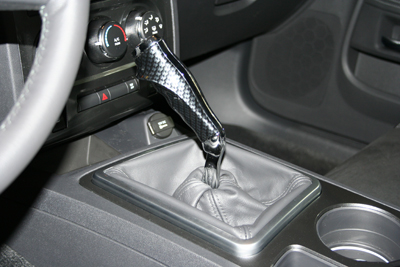
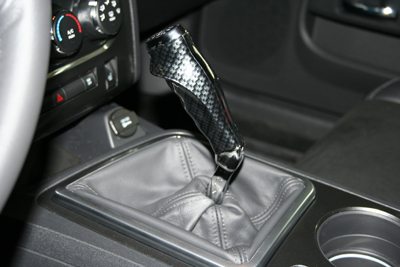
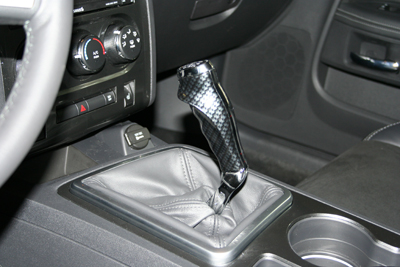
This came with a very nice handle and classic shift knob, but I could not settle for this. I purchased a Gunslinger Pistol grip shifter handle as well. The handle has the classic Challenger style but is finished in carbon fiber which matches the interior trim much better than the original wood look. It also has a six speed indicator on the handle.
The install was quite simple, the only concerns are that a lot of parts snap together and removing these felt like they were going to break every time. The sequence is a follows:
- Unsnap the shifter boot bezel
- Remove 13mm bolts holding shifter handle on and remove.
- Unsnap upper console by pulling straight up. Remove 12V power cable and cup hold light cable. Remove upper console from car.
- Unscrew two screws at front of lower console. Remove 4 8mm bolts from inside storage compartment at back of console. Lift and remove ipod cable and rear 12V power cable. Remove lower console from vehicle.
- Lift rubber boot above tunnel cover and push forward. This is a pain as the boot does not seem to come out but just pushing it forward does not leave any room to remove the front tunnel cover nuts.
- Remove 6 10mm nuts holding tunnel cover. Remove 13mm nut on rear shifter mounting tud. Remove tunnel cover.
- Remove rear shift link nut. This is very tight as there is blue loctight on it.
- Remove both front pins hold shifter in. Each pin has a clip that has to be pried loose and then the pins can slide out.
- Remove shifter from vehicle.
- Remove original lower and upper rubber shifter boots.
- Install original boots onto Hurst shifter.
- Perform steps 9 through 3 in reverse order.
At this point I test fit the Gunslinger shifter into the vehicle but was not happy with how high the shifter sat. I decided to drill a new hole in the shifter so I would sit lower. I drilled a 0.375" hole 0.875" above the top mounting hole. This drops the shifter almost an inch. Mounting the shifter handle lower does not cause any interference so you do not have to trim the lower portion of the shifter.
- Remove clip around original shifter handle to release boot from handle.
- Slide boot around Gunslinger handle. Use a tie wrap to strap boot to handle
- Install handle to right hand side of Hurst shifter. I used blue loctight on button head screws that hold shifter in as its hard to tighten these bolts as they are Allen key heads.
- Snap shifter bezel back into console.
And here are some pictures after the install.
1st Gear
Neutral
2nd Gear
I am quite happy with the look and feel of this new shifter. I am not quite happy with how the leather boot looks. I will probably change this in the future.
|