Automotive Resources
| Pumped Up - Sunday - May 1 |
 |
 |
 |
| Written by Administrator |
| Sunday, 08 May 2011 07:36 |
|
Page 4 of 11
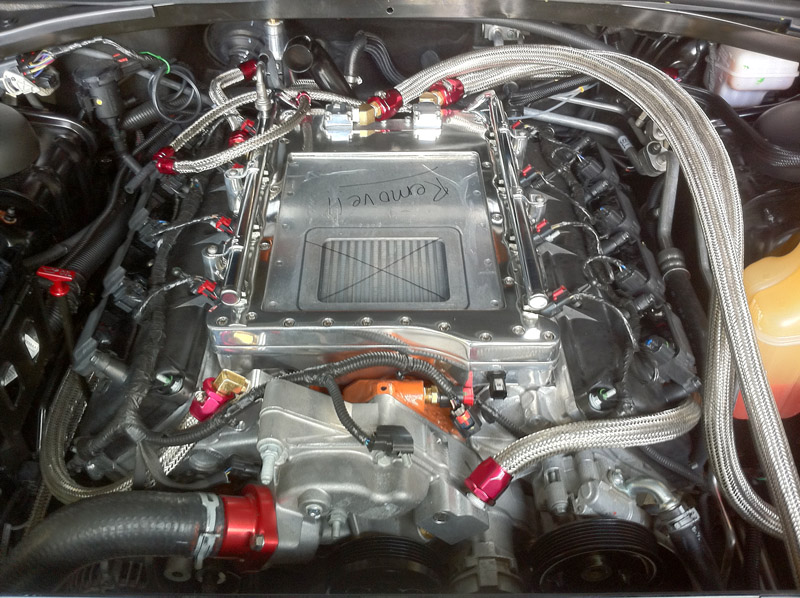
Sunday - May 1Next the Discharge assembly was installed and torqued down to spec. The Heat exchanger was bolted to the bumper and the coolant reservoir slid into the mounting bracket molded into the stock engine coolant reservoir. Then all the coolant lines were installed to the discharge, heat exchanger, pump, and reservoir. I also re-installed the cross brace after the paint I applied to the hacked off areas had dried. Here is what looked like at this stage.
Now the part I have been dreading, I had to drill the crank to install 2 dowel pins. First the fan assembly was removed, and then the crank bolt. The supplied drilling jig was installed and drilling started. There is hardly any room between the pulley and radiator so you need a small angle drill or this is not possible. I have an 90 degree air drill and even that left no room to get enough pressure on the drill to make any headway. After an hour of making no progress I decided to get a long 1x4 and use it as a lever. I placed it in between the rad and drill, one end touching the bottom rad support, the drill hitting half way up the board, and pushing on the other end. This leverage made all the difference. I only drilled a little bit at a time and kept adding spacers between the board and drill to keep the force on the drill as parallel as possible. Finally, the holes were at the required depth. Now to install the dowel pins. The problem here is you can not see the holes without a mirror. I tried a few different approaches to try and get these started. In the end I used a deep socket that the pin fit into but left the end of the pin sticking out 5 mm or so. Tapping on the end of the socket the pin slid into the hole easily. The pins were then tapped in the rest of the way. The Crank bolt was then re-installed and torqued. Before I re-installed the fans, I took the opportunity to replace the thermostat with the supplied 180 version while I had extra room. After this was replaced, the fan assembly was then re-installed.
|
| Last Updated on Friday, 03 June 2011 10:32 |